所有完整的代码可以在我的Github中找到,嘘~,里面还有一个给任意元素添加水波纹效果的 SVG 。
里面手撕图标的例子用了掘金的 logo,下面是完整的文章~。
对于前端的 2D 动画需求,一般首先会考虑 CSS 动画,其次是直接贴图,实在不行可能还要上 Canvas 。
其实有一大部分需求如果用 SVG 会更加简单,SVG 可以和 Js 很好的融合在一起,写法上与熟知的 CSS 动画也大同小异,又可以实现一些纯 CSS 不好实现的动画,因为其矢量图的性质还可以在微信公众号内直接使用,用来实现一些交互式动画让运营小姐姐惊呼卧槽再好不过。
可缩放矢量图形相比位图的优势除了可以无限放大而没有质量损失外的一大优势是一旦掌握其原理,无需打开绘图工具即可手撸图形。
本文会实现几个实用(和不实用)的 SVG 动画,来熟悉一下 SVG 的基础和感受一下 SVG 的魅力。
SVG 的写法上与 HTML 一致,都是以闭合的标签来定义:
<svg class="svg-board" xmlns="http://www.w3.org/2000/svg" style="width: 300px;height: 300px;"></svg>
xmlns 用来标识应用的命名空间,不写的话某些浏览器可能会解析不正常。
与普通 HTML 标签一样,可以为它定义 class,id 等属性,可以通过 Js 来索引到,也可以为其添加 CSS 。
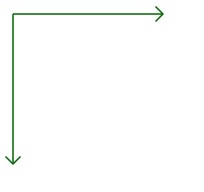
与数学中的坐标系不同,计算机中的图形坐标系一般都是以左上角为 0,0 点,向下移动时增加 y,向右移动时增加 x,可以设置多种单位,不写的话是 px 。

SVG 中基本的形状有以下几种:
<rect>、<circle>、<ellipse>、<line>、<polyline>、<polygon>、<path>
分别用来定义矩形,圆形,椭圆,线段,多段连续线段,多边形,以及多种图形的组合。
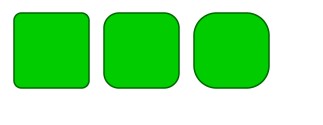
<rect>:

<circle>:
<ellipse>:
<line>:
<polyline>:
<polygon>:
<path>:
<path>是最强大的图形工具,可以画任意图形,同时也难以掌握,参数众多,手撸比较痛苦,复杂的图形基本靠 UI 小姐姐切成 SVG 然后我们在加特效上去。
他们通用的属性常用的有:
fill,stroke,stroke-dasharray,stroke-dashoffset
分别代表填充色和轮廓色。
可以直接设置,也可以写成 style 用 CSS 来写,以最后的小月亮为例:
<svg xmlns="http://www.w3.org/2000/svg"
    xmlns:xlink="http://www.w3.org/1999/xlink">

    <path d="M40,20  A30,30 0 0,0 70,70" style="stroke: #cccc00; stroke-width:2; fill:none;"/>

    <path d="M40,20  A30,30 0 1,0 70,70"
        style="stroke: #ff0000; stroke-width:2; fill:none;"/>
</svg>
两段<path>都只画了 stroke(轮廓),没有进行填充,两条线弧线拼在一起形成了小月亮,下面给第一个设置为pink:
<svg xmlns="http://www.w3.org/2000/svg"
    xmlns:xlink="http://www.w3.org/1999/xlink">

    <path d="M40,20  A30,30 0 0,0 70,70" style="stroke: #cccc00; stroke-width:2; fill:pink;"/>

    <path d="M40,20  A30,30 0 1,0 70,70"
        style="stroke: #ff0000; stroke-width:2; fill:none;"/>
</svg>
就变成了一个小西瓜。
这里要注意fill如果不想要一定要设为none,默认的话是黑色的。
stroke-dasharray可以设置一组虚线值:
<path d="M40,20 A30,30 0 0,0 70,70" style="stroke: #cccc00; stroke-width:2; fill:pink; stroke-dasharray: 10 5 5 10"/>
根据你设置的值按照宽度-间隔的模式循环,上面10 5 5 10会有一个 10px 长度的虚线,5px 的间隔,之后会有一个 5px 的虚线,然后 10px 的间隔,之后按照此模式循环出现虚线。
stroke-dasharray一般会与stroke-dashoffset一起出现,来做一些线段动画,stroke-dashoffset用来设置虚线的起始点。
下面一起来撸一个掘金的 logo,并让他一点点绘制起来。
掘金的 logo 也是一个 svg 图形,点开可以看到它是一条<path>实现的,实际项目里可能会让 UI 小姐姐切图出来而不会亲自写<path>,下面我们用其他语义化更强的形状来实现一下。
掘金的 logo 分为三部分,最上面是个菱形,之后是两个折线,写的时候记得翻手册,我也是翻着手册写的(嘿嘿~)。
菱形我们可以用<polyline>或者<polygon>来填充色实现:
<svg xmlns="http://www.w3.org/2000/svg">
    <polygon points="165,0 180,15 165,30 150,15" fill="#1E80FF"></polygon>
</svg>
这里如果用填充色后面是没法用 stroke-dasharray 来让它动起来的,为了方便我们还是用了填充色。
折线我们需要用polyline设置一下 stroke 相关属性来实现:
<svg xmlns="http://www.w3.org/2000/svg">
    <polygon points="165,0 180,15 165,30 150,15" fill="#1E80FF"></polygon>
    <polyline points="141,24 165,40 189,24" style="fill:none;stroke-width: 7px;stroke:#1E80FF"></polyline>
    <polyline points="130.5,35.5 165,55 199.5,35.5" style="fill:none;stroke-width: 7px;stroke:#1E80FF"></polyline>
</svg>
这里设置 fill 为 none,只设置轮廓颜色来展示两条虚线:
还是稍微有点僵硬,这里不继续打磨了,有兴趣可以自行继续~。
上面说到 stroke-dasharray 可以这是虚线和虚线的间隔,我们可以将虚线设置的与原 stroke 长度一样间隔也是刚好可以,然后设置 stroke-dashoffset 将起始点设置也与长度的一样,这样开始时是一个隐藏的,然后慢慢将 offset 归零实现一个线段动画。
<svg xmlns="http://www.w3.org/2000/svg">
    <polygon points="165,0 180,15 165,30 150,15" fill="#1E80FF"></polygon>
    <polyline class="line" points="141,24 165,40 189,24" style="fill:none;stroke-width: 7px;stroke:#1E80FF"></polyline>
    <polyline class="line2" points="130.5,35.5 165,55 199.5,35.5" style="fill:none;stroke-width: 7px;stroke:#1E80FF"></polyline>

    <style>
        .line {
            stroke-dasharray: 59;
            stroke-dashoffset: 59;

            animation: show 2s linear infinite;
            animation-fill-mode: forwards;
        }

        .line2 {
            stroke-dasharray: 79;
            stroke-dashoffset: 79;

            animation: show2 2s linear infinite;
            animation-fill-mode: forwards;
        }

        @keyframes show {
            0% {
                stroke-dashoffset: 59;
            }

            100% {
                stroke-dashoffset: 0;
            }
        }

        @keyframes show2 {
            0% {
                stroke-dashoffset: 79;
            }

            100% {
                stroke-dashoffset: 0;
            }
        }
    </style>
</svg>
一切都是熟悉的 CSS 动画。
我们甚至可以给原 logo 做一些改进加上这个动画:
哈哈,有点酷酷的,截得 gif 帧数较低,没法直接贴带动画的 SVG,可以复制自浏览器试试。
<svg xmlns="http://www.w3.org/2000/svg">

    <path xmlns="http://www.w3.org/2000/svg" fill-rule="evenodd" clip-rule="evenodd" d="M15.0737 5.80396H15.0757L18.706 2.91722L15.0757 0.00406298L15.0717 0L11.4475 2.91112L15.0717 5.80193L15.0737 5.80396ZM15.0757 14.9111L15.0778 14.9091L24.4429 7.52057L21.9036 5.48096L15.0778 10.8664L15.0757 10.8685L15.0737 10.8705L8.2479 5.48502L5.71057 7.52463L15.0737 14.9132L15.0757 14.9111ZM15.0716 19.9614L15.0757 19.9593L27.614 10.066L30.1534 12.1056L24.449 16.6053L15.0757 24L0.243779 12.3047L0 12.1117L2.53936 10.0721L15.0716 19.9614Z" class="logo"/>

    <style>
        .logo {
            fill: none;
            stroke: #1E80FF;
            stroke-dasharray: 106;
            stroke-dashoffset: 106;
            animation: logo 1.5s linear infinite;
            animation-fill-mode: forwards;
            transform: scale(3);
        }

        @keyframes logo {
            0% {
                stroke-dashoffset: 106;
            }

            100% {
                stroke-dashoffset: 0;
            }

        }
    </style>
</svg>
前几天大火的微信炸屎我们来用 SVG 来实现一下,相比 Canvas 不用处理每一帧的状态也不用写复杂的数学函数。
我们需要三段不同的图片,炸弹,爆炸效果,粑粑。
第一段中我们需要将炸弹丢出去,需要让炸弹沿着抛物线轨迹运动,这个在 SVG 里可以很轻易的用<animateMotion>来实现,用 CSS 则比较困难。
第二段爆炸我们直接播放 gif 即可。
第四段粑粑出现与下落是一个 Scale 增大,transform 移动与 opacity 逐渐透明的过程,其实用 CSS 也可以轻易实现,不过我们为了 SVG 的连贯与学习的目的,也用 SVG 来实现。
<svg width="500px" height="600px" version="1.1" xmlns="http://www.w3.org/2000/svg">
    <svg height="300px" version="1.1" xmlns="http://www.w3.org/2000/svg">
        <defs>
            <g id="boom">
                <image width="30" height="30"
                href="./zha.svg">
                    <animateMotion path="M 255 79 C 256 79 133 -60 47 33" begin="0s" dur="1s" repeatCount="1" />
                    <animate id="op" attributeName="opacity" from="1" to="0" begin="0.8s" dur="0.2s" repeatCount="1" fill="freeze">
                    </animate>
                    <animateTransform attributeName="transform"
                    type="rotate"
                    from="0 15 15" to="360 15 15"
                    begin="0s" dur="1s"
                    repeatCount="1"
                    />
                </image>
            </g>
        </defs>
        <use href="#boom" />
    </svg>
</svg>
defs/g/svg/symbol都可以聚合一组 SVG 内元素,我们每个都试一下,各个都有点细微的区别,defs 只用来定义而不显示出里面的 SVG,g 只聚合不影响内部显示(除非设置了其他属性),g 相比 svg 来说可以设置transform,symbol 相比 g 来说多了viewbox和preserveAspectRation属性可以设置。
之后可以用use来索引到上面元素所定义的 svg 图形。
image和img标签类似,来显示图片,内部的我们一共写了三段混合的动画来控制整个过程:
<animateMotion path="M 255 79 C 256 79 133 -60 47 33" begin="0s" dur="1s" repeatCount="1" />
用来让图片以 path 定义的路径运动,这个 path 画出来的话就是一段抛物线,总动运动 1 秒。
<animate id="op" attributeName="opacity" from="1" to="0" begin="0.8s" dur="0.2s" repeatCount="1" fill="freeze">
在炸弹快要落地的时候我们要将炸弹隐藏,fill="freeze"可以让这段动画的结果变为最终值,类似animation-fill-mode: forwards,我们让炸弹最终隐藏掉不再显示。
<animateTransform attributeName="transform"
    type="rotate"
    from="0 15 15" to="360 15 15"
    begin="0s" dur="1s"
    repeatCount="1"
/>
最后这个混合的动画在抛物线运动一开始执行,让炸弹旋转一圈。
这里要注意一下 SVG 中旋转与 CSS 旋转的不同点,CSS 中的旋转会以自身中心点开始旋转,SVG 则是绕着给定的坐标点旋转,rotate(360, 15, 15),因为上面我们定义了大小为 30x30,自身中心点则是 15x15,当然有其他 x,y 的话还要加上 x,y,写的时候注意一下这边。
爆炸我们直接贴个图即可:
<g id="bom">
    <image width="200" height="200"
        opacity="0"
        href="./baozha.gif">
        <animate id="bomStart" begin="op.end" attributeName="opacity" from="1" to="1" dur="0.2s" repeateCount="1"></animate>
        <animate id="bomEnd" begin="bomStart.end" attributeName="opacity" from="1" to="0" dur="0.2s" repeateCount="1" fill="freeze"></animate>
    </image>
</g>
同样的思路,根据不同的爆炸 gif 调整调整时间大小即可。
<symbol id="shit">
    <image width="100%" height="50%" opacity="0" href="./shit.png">
        <animate attributeName="opacity" from="1" to="1" begin="bomStart.end" dur="2.4s" repeatCount="1"></animate>
        <animateTransform id="scale" attributeName="transform" type="scale" from="0.5" to="1" begin="bomStart.end"
        dur="0.1s"></animateTransform>
        <animateTransform attributeName="transform" type="translate" from="0 0" to="0, 40" begin="scale.end + 0.8s" dur="1.5s" repeatCount="1"></animateTransform>
        <animate attributeName="opacity" from="1" to="0" begin="scale.end + 0.8s" dur="1.5s" repeatCount="1" fill="freeze"></animate>
    </image>
</symbol>
粑粑我们初始显示为透明,我们不需要它一开始就显示,需要在爆炸后出现。
第二段动画变化scale,让粑粑从小到大突然出现。
第三段动画则是在粑粑出现后的开始擦屏幕版的向下移动。
最后一段则是一个重新隐藏的过程。
<svg style="position:absolute" width="500px" height="400px" version="1.1" xmlns="http://www.w3.org/2000/svg">
    <use x="250" y="30" href="#shit" width="150" height="300" transform="rotate(-17, 250, 30)" />
    <use x="100" y="30" href="#shit" width="120" height="240" />
    <use x="50" y="160" href="#shit" width="90" height="180" />
    <use x="250" y="160" href="#shit" width="180" height="360" />
    <use x="200" y="160" href="#shit" width="90" height="180" />
</svg>
一个use就是一个粑粑。
可以继续打磨一下,多写几个不同的粑粑效果~。
每次 618,双 11 活动总能看到淘宝天猫的各类型红包雨,随机出现的红包雨运动曲线让 CSS 有点难以招架,一般也都会选用 Canvas 来做,其实也可以用 SVG 来做。
经过上面的实现我们已经有了 SVG 动画的知识,我们来简单实现一个下红包雨的效果。
<image
    href="hongbao.png"
    width="100px"
    height="100px"
    style="transform-box: fill-box; transform-origin: center; cursor: pointer"
    transform="rotate(25)"
>
    <!-- 这里也可以分开写 animate x y -->
    <animateMotion
        path="M 0 0 L 1000 100"
        begin="0s"
        dur="10s"
        repeatCount="indefinite"
    />
</image>
这里我们用 width 和 height 来指定红包大小,继续用 rotate 来旋转红包,我们通过之前的知识知道 SVG 中的 rotate 需要指定具体的 x,y 值,否则不会按中心点旋转,这对于这种需要旋转但是每一帧的位置都不同的元素来说尤其困难,这里我们可以用transform-box: fill-box; transform-origin: center;来让 SVG 中的 rotate 行为与 CSS 中默认的行为一致。
倾斜运动这里省事直接写了 path,一条斜线。
最后的随机出现我们可以给不同的红包设置不同的 dur 来造成一种伪随机的现象,当然也可以在它 end 的时候删掉它加一个新的。这样单个红包的运动就做好啦。
我们只需要将单个红包组合即可生成红包雨,用到 Vue 或者 React 等框架的话可以直接写属性,这里直接用原生的撸方便无依赖:
<body>
    <svg id="svgboard" version="1.1" xmlns="http://www.w3.org/2000/svg">
    </svg>
</body>
<script>

    const getX = (box=new Array(), config = {}) => {
        // box 可传引用,也可以 return 。
        let maxX = document.documentElement.clientWidth

        config = {
            num: 15,
            minWidth: 104,
            maxWidth: 146,
            minHeight: 145,
            maxHeight: 204,
            durBase: 10,
            imageLink: 'bg.png',
            ...config,
        };
        let { num, minWidth, maxWidth, minHeight, maxHeight, durBase, imageLink } = config;
        for (let i = 0; i < num; i++) {
            let height = Math.random() * (maxHeight - minHeight) + minHeight;

            box.push({
                key: +new Date() + Math.random() + i,
                width: Math.random() * (maxWidth - minWidth) + minWidth,
                height: height,
                x: Math.random() * maxX + 1,
                y: `-${height}`,
                dur: Math.random() * durBase + 1,
                imageLink: imageLink
            });
        }

        return box
    };

    function createSVGElement(elementName) {
        let node = document.createElementNS('http://www.w3.org/2000/svg', elementName)

        return node
    }

    function setAnimation(board, lists) {
        let maxY = document.documentElement.clientHeight
        for (let item of lists) {
            let image = createSVGElement('image')
            image.addEventListener('click', () => {
                // alert 会阻塞住整个渲染进程,但动画好像还在继续。
                // 这里最好用 Promise 直接写一个弹窗。
                alert('哦吼,红包 1 个亿')
            })
            image.setAttribute('href', item.imageLink)
            image.setAttribute('width', item.width)
            image.setAttribute('height', item.height)
            image.setAttribute('style', 'transform-box: fill-box; transform-origin: center; cursor: pointer')
            image.setAttribute('transform', 'rotate(25)')
            let motion = createSVGElement('animateMotion')
            motion.setAttribute('path', `M ${item.x} ${item.y} L ${item.x - 500} ${maxY + 500}`)
            motion.setAttribute('begin', '0s')
            motion.setAttribute('dur', `${item.dur}s`)
            motion.setAttribute('repeatCount', 'indefinite')

            image.appendChild(motion)

            board.appendChild(image)
        }
    }

    function insertImage() {
        let board = document.querySelector('#svgboard')
        let bgArguments = getX()
        let starArguments = getX(new Array(), {minWidth: 21, maxWidth: 21, minHeight: 21, maxHeight: 21, imageLink: 'star.png'})
        let lineArguments = getX(new Array(), { num: 13, minWidth: 16, maxWidth: 16, minHeight: 114, maxHeight: 114, imageLink: 'line.png'})
        setAnimation(board, bgArguments)
        setAnimation(board, starArguments)
        setAnimation(board, lineArguments)
    }

    insertImage()
</script>
里面的图片可以找其他的替换一下,比起 Canvas,这个都是熟悉的配方,熟悉的味道~,用框架的话整体可能不超过 20 行就可以实现~。
这是一个专为移动设备优化的页面(即为了让你能够在 Google 搜索结果里秒开这个页面),如果你希望参与 V2EX 社区的讨论,你可以继续到 V2EX 上打开本讨论主题的完整版本。
V2EX 是创意工作者们的社区,是一个分享自己正在做的有趣事物、交流想法,可以遇见新朋友甚至新机会的地方。
V2EX is a community of developers, designers and creative people.